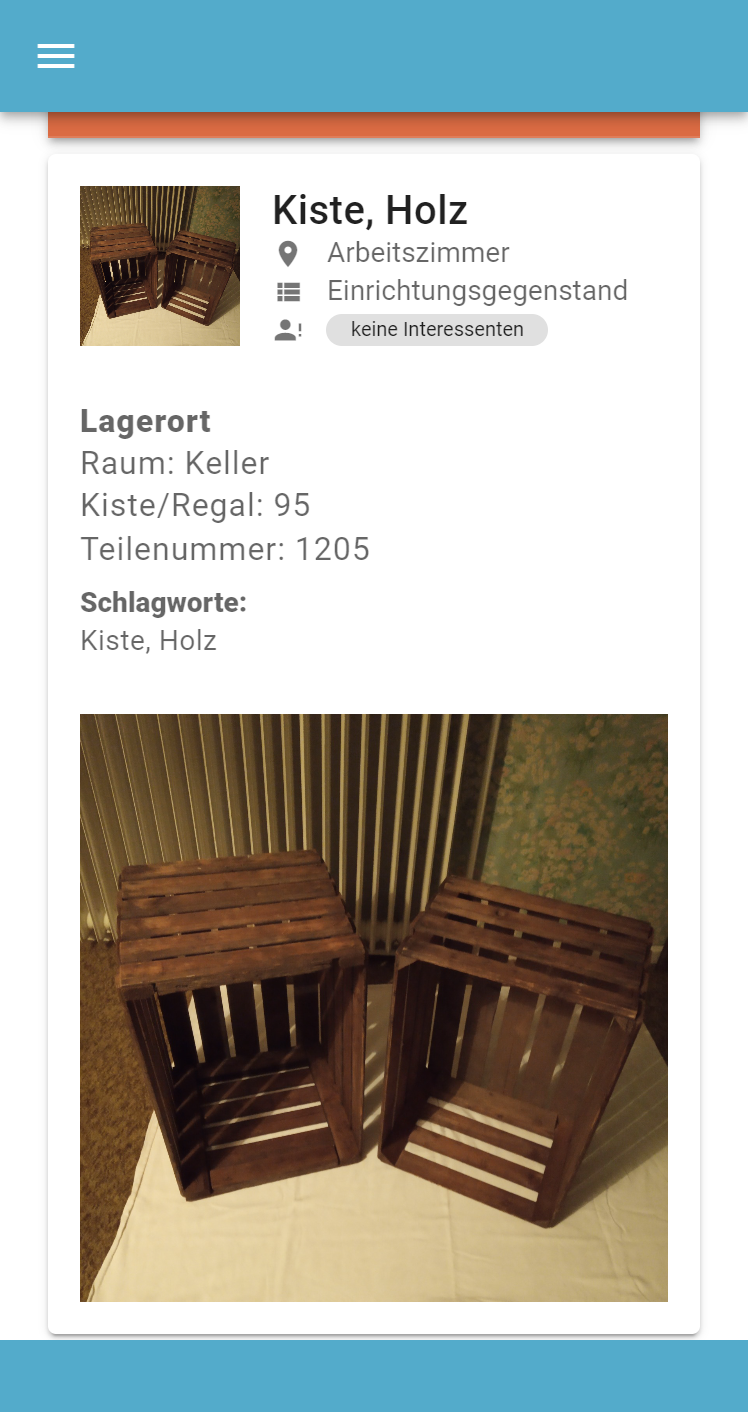
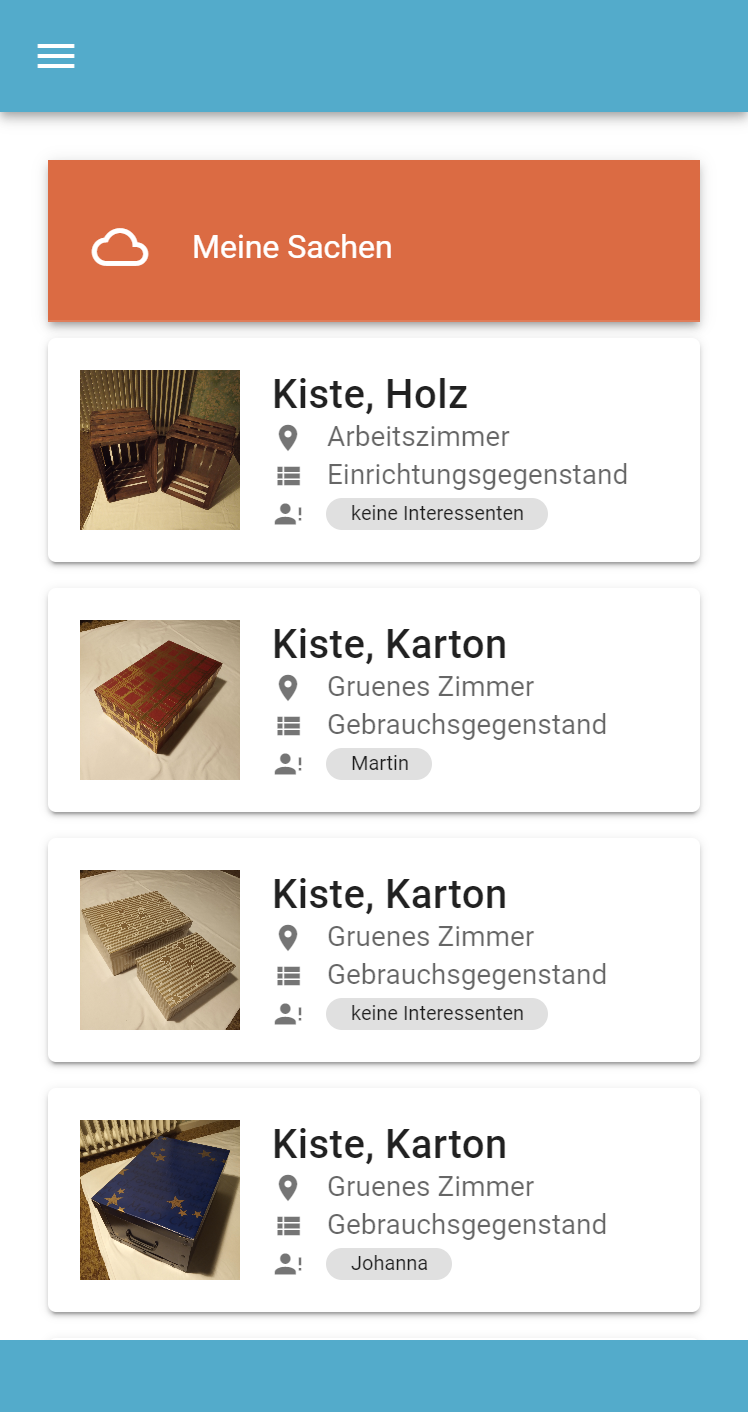
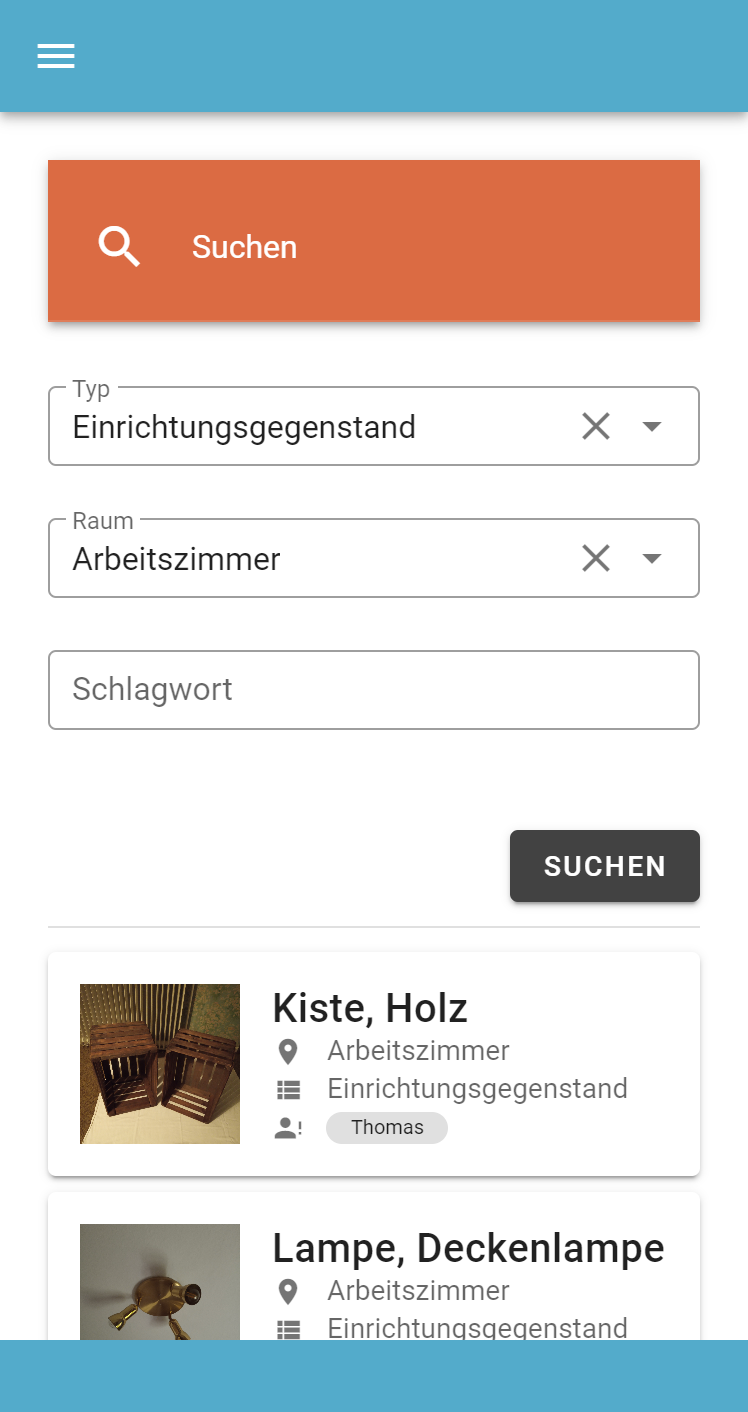
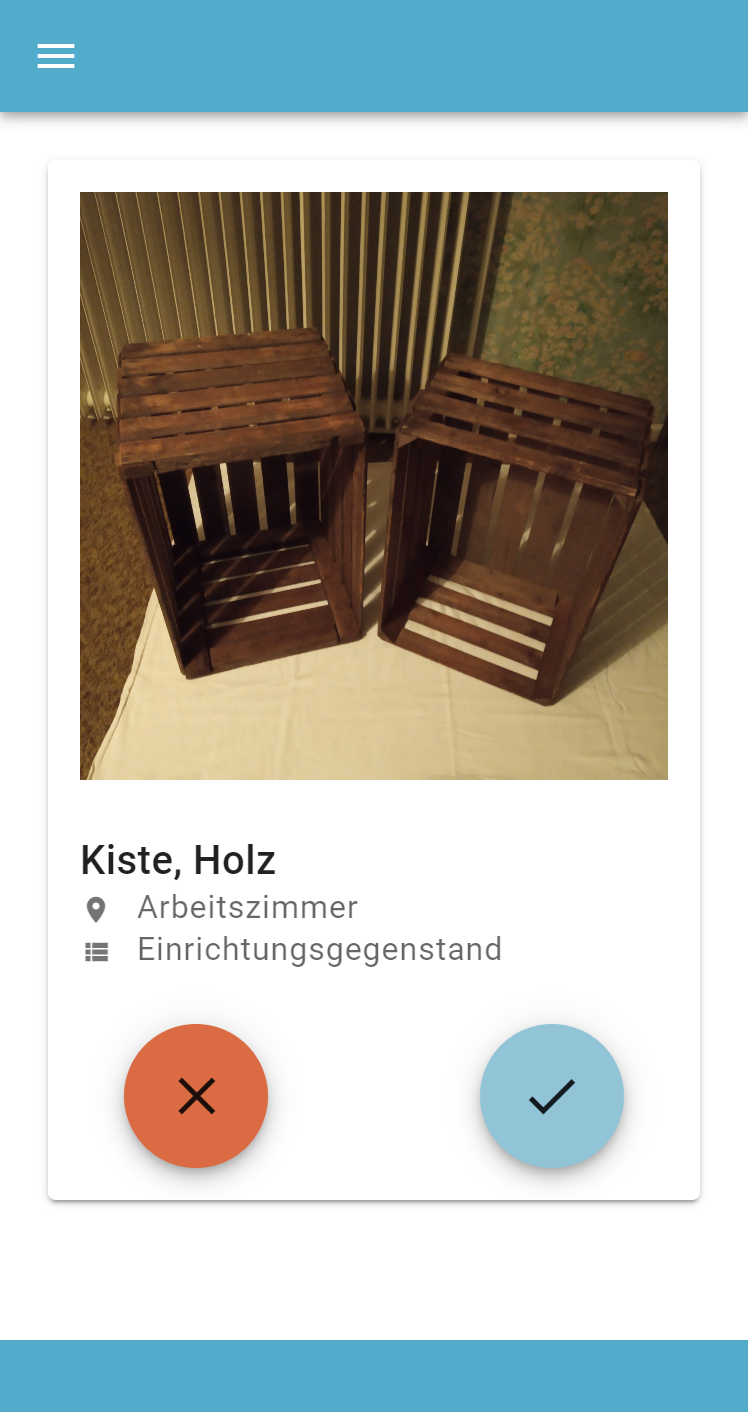
A progressive web app for collaborative digital management and dissolution of a household. I built this app to organize a household I needed to straighten and dissolute during the corona virus pandemic in 2020. By using this app I my family was able to select items they wanted to keep easily in a smartphone app. Furthermore, it allowed to pack everything together whilst storing the locatin information in a database to digitally search for stuff and getting a position in a shelf or box as a result.
A progressive web app for collaborative digital management and dissolution of a household. I built this app to organize a household I needed to straighten and dissolute during the corona virus pandemic in 2020. By using this app I my family was able to select items they wanted to keep easily in a smartphone app. Furthermore, it allowed to pack everything together whilst storing the locatin information in a database to digitally search for stuff and getting a position in a shelf or box as a result.
Normally cron send task outputs (echo) via mail. As the MTA (Mail Transfer Agent),
may not be set up, the crontab line redirect the outputs into /dev/null.
It can also be a path to a log file.
No sudo is needed, crontab is called with current user.
Advanced parameters
Both python scripts can have a finer configuration (sqlite and html paths).
To see all accepted parameters use -h flag, like
AnyLedger Hub is the bridge connecting the IoT device featuring the embedded wallet and a given blockchain. It consist of a series of moving pieces like the LWM2M server to remotely manage the devices (device lifecycle management, over-the-air updates, etc.), the blockchain nodes and decentralised storage solutions. It also includes a set of standard smart contracts implementing features like digital twin, decentralised access control, multisignature contracts, etc.
What is inside the current repo:
It is an umbrella repo for the following submodules:
anyledger-hub-web – AnyLedger Hub static HTML/JavaScript web page served by the IPFS
decentralized-storage – IPFS node responsible for hosting data in decentralised fashion. Can be used for instance to store IoT data, HTML/JavaScript web pages, object graphs and more.
ethereum-private-network – Private Ethereum full node. Currently not used.
leshan – LWM2M (Lightweight Machine 2 Machine) Server which is storing its object graph on IPFS and Ethereum
smart-contracts – Ethereum and HyperLedger Smart Contracts which are used for Digital Twin Root of Trust, Access Control, etc.
This repo also contains Docker Composer file which spins the whole platform on a single machine. It is meant to be used for development and demo purposes.
Example Features
-Decentralised Access Control
The device owner can be interested in setting an access control policy for the remote access of the device. This can be achieved in a decentralized fashion, that is relying on private keys authentication and without the need of a central server, by storing the access control policy on a smart contract.
-Decentralised Digital Twin
A way to achieve this with AnyLedger Hub is the following: the devices registered on Leshan are stored on IPFS together with their metadata. Moreover, thanks to another smart contract, every device id is associated to the respective IPFS hash. Every additional update of the device status can be included on IPFS by storing the previous hash together with the new metadata, therefore creating an immutable history of the device lifecycle.
AKA MBOptionScreen Standalone.
Previously, a fork of ModLib that was de-forked.
Sources available at GitHub!
Credits to Drogean for the MCM Logos!
MCM is a Mod Options screen library designed to let modders use its API for defining the options.
MCM supports three setting types – Global, PerCampaign and PerSave. Global are shared across characters and saves, PerCampaign are persistent within a single campaign, PerSave are stored within the save file!
It provides 5 types of options:
Bool
Int Slider / Textbox
Float Slider / Textbox
Textbox
Dropdown
Button
The settings can be defined at compile time by using the Attribute API and at runtime by using the Fluent Builder.
MCM uses the following 3 framework level libraries:
Harmony is used to have a single 0Harmony.dll across the game.
ButterLib is a general modding library that eases mod development.
UIExtenderEx is an general UI manipulation library.
Find the Modules folder in your Bannerlord installation location. For Steam users, this is usually here: C:\Program Files (x86)\Steam\steamapps\common\Mount & Blade II Bannerlord\Modules
Download the latest version of this mod and drop the folder inside Modules from the archive into your game’s Modules folder.
Start the Mount & Blade II: Bannerlord launcher and select all Mod Configuration Menu mods to be loaded.
Your Modules folder structure should look something like this:Your mod order in the launcher should look something like this:
Unblocking DLL’s
You may need to right click on every *.dll files, click Properties, and click Unblock if you extracted the zip file with Windows Explorer or other programs that try to secure extracted files.
Harmony installation issues:
Check Harmony’s Troubleshooting for more info on how to fix it.
Generative Adversarial Networks (GANs) are powerful machine learning models capable of generating realistic image, video, and voice outputs.
Rooted in game theory, GANs have wide-spread application: from improving cybersecurity by fighting against adversarial attacks and anonymizing data to preserve privacy to generating state-of-the-art images, colorizing black and white images, increasing image resolution, creating avatars, turning 2D images to 3D, and more.
About this Specialization
The DeepLearning.AI Generative Adversarial Networks (GANs) Specialization provides an exciting introduction to image generation with GANs, charting a path from foundational concepts to advanced techniques through an easy-to-understand approach. It also covers social implications, including bias in ML and the ways to detect it, privacy preservation, and more.
Build a comprehensive knowledge base and gain hands-on experience in GANs. Train your own model using PyTorch, use it to create images, and evaluate a variety of advanced GANs.
Applied Learning Project
Course 1: In this course, you will understand the fundamental components of GANs, build a basic GAN using PyTorch, use convolutional layers to build advanced DCGANs that processes images, apply W-Loss function to solve the vanishing gradient problem, and learn how to effectively control your GANs and build conditional GANs.
Course 2: In this course, you will understand the challenges of evaluating GANs, compare different generative models, use the Fréchet Inception Distance (FID) method to evaluate the fidelity and diversity of GANs, identify sources of bias and the ways to detect it in GANs, and learn and implement the techniques associated with the state-of-the-art StyleGAN.
Course 3: In this course, you will use GANs for data augmentation and privacy preservation, survey more applications of GANs, and build Pix2Pix and CycleGAN for image translation.
Assess the challenges of evaluating GANs and compare different generative models
Use the Fréchet Inception Distance (FID) method to evaluate the fidelity and diversity of GANs
Identify sources of bias and the ways to detect it in GANs
Learn and implement the techniques associated with the state-of-the-art StyleGANs
COURSE 3
Apply Generative Adversarial Networks (GANs)
4.8stars – 459 ratings
In this course, you will:
Explore the applications of GANs and examine them wrt data augmentation, privacy, and anonymity
Leverage the image-to-image translation framework and identify applications to modalities beyond images
Implement Pix2Pix, a paired image-to-image translation GAN, to adapt satellite images into map routes (and vice versa)
Compare paired image-to-image translation to unpaired image-to-image translation and identify how their key difference necessitates different GAN architectures
Implement CycleGAN, an unpaired image-to-image translation model, to adapt horses to zebras (and vice versa) with two GANs in one.
Instructors
Sharon Zhou
Instructor
Computer Science, Stanford University
Eda Zhou
Curriculum Developer
Eric Zelikman
Curriculum Engineer
50,046 Learners
Offered by
DeepLearning.AI
DeepLearning.AI is an education technology company that develops a global community of AI talent.
A touch-based gaming app, where a user will find the target location with the help of directions provide by the app with respect to User location.
If a user touches or clicks the first color of app then it provides a valid treasure location from the given set of locations.
If a user touches or clicks repeatedly on second color then the device compares the current location coordinates with the target location and tells the user whether they are inside or outside the treasure location.
If a user is far from target location then, User will hear and see the directions in which he/she needs to move to reach the treasure location.
Finally, when user reaches the destination then the user will hear and see the confirmation of reaching the selected treasure location.
As a player, I want to touch/click the first color to request a valid (treasure) location.
As a player, I want to hear confirmation that a location has been selected (so I can I can begin searching).
As a player, I want to touch/click the second color: If I am outside the treasure location, I want to hear information to help me find the treasure location (clue? how far away? what direction to walk?)
As a player, I want to touch/click the second color: If I am inside the treasure location, I want to hear and see confirmation that I have earned this treasure.
As a player, after confirmation that I have earned a location, I can start a new game again.
CRUD operations for Location
User can enable all CRUD options (create, read, update, delete,list) on locations.
create.ejs
delete.ejs
details.ejs
edit.ejs
index.ejs
list.ejs
Locations are based on circles.
Guidelines to Contribute
In order to get someone’s repo into your local machine you should first fork it into repo then Clone it to your local machine.
Step 1 – To get the fresh code
Everytime you should pull the fresh code from shared cloud repo and then add or modify the code then commit it by using git add and git push commands below line interface
Update your cloud repo by using git add and git push commands in command .
Start the app by running npm run start.
Until error handling is complete, a clean shutdown is better.
Once error handling is complete, use npm run dev to start with nodemon.
In order to update the code and see the changes evrytime locally then use the command “npm run dev” .
Example of encrypting/decrypting data thru an API using node.js.
The idea with this example is to test how to store encrypted data under a datastore (ex. MongoDB) and keep control of your data by providing the encryption key for each call.
This project doesn’t cover encryption in transit (SSL) and not meant to be used in production.
Features
API storing endpoint that encrypts data with the provided key and stores it into a MongoDB collection (AES-256-GCM encryption)
API retrieval endpoint that decrypts data with the provided key and returns the data
AES-256-GCM encryption that uses a random Initialization Vector (IV) and Auth TAG
IV and Auth TAG stored with the encrypted data (separated by a : character)
Logs with correlation ID
Hardening of the HTTP Headers with Helmet
MongoDB as a data store (using Mongoose)
Swagger support for API specifications/documentation (WIP)
Health check endpoint to check if the app is still alive
Dockerfile to generate the Docker image
Docker Compose file to launch the API and MongoDB official Docker images
Build, test and deploy to Docker Hub with GitHub Actions
SonarQube code quality check (SonarCloud)
Unit tests and functional tests
Postman collection and environment
Run locally
Install
node install
Run
npm start
Tests
npm test
Tests coverage
npm run test:coverage
Functional tests
npm run test:functional
Run all the tests
npm run test:all
Docker
Docker Compose
Be sure that you are not running MongoDB + another node.js app that uses the 3000 port
docker-compose up
Test with Postman
First, you need to import the Postman environment.
There is a default encryption key and ID to have a quick look to the API.


 https://github.com/thlemm/HouseholdOrganizer-App